A310 1982 spring tools and techniques

A place to showcase your pride and joy

Moderators: eastlmark, BIG_MVS, Test Moderator

no avatar
User

Øyvind

Rank

Non Member

Posts

24

Joined

Mon Jun 01, 2015 10:04 am

Location

Norway


Has thanked: 0 time
Been thanked: 0 time

A310 1982 spring tools and techniques

Postby Øyvind » Wed Jun 15, 2016 10:52 am

Anyone wants to share their experiences regarding dismantling (for now) front springs and shock absorbers? It is cramped and none of the spring clips I've got hold of suites.

For whom it may concern, I can upload some tüv certificates regarding springs and dampers for A310 I just got.

Øyvind
no avatar
User

Øyvind

Rank

Non Member

Posts

24

Joined

Mon Jun 01, 2015 10:04 am

Location

Norway


Has thanked: 0 time
Been thanked: 0 time

Re: A310 1982 spring tools and techniques

Postby Øyvind » Wed Jun 15, 2016 11:03 am

Here you are.
You do not have the required permissions to view the files attached to this post.
User avatar
User

johnb

Rank

Club Member

Club Member
Posts

857

Joined

Wed Sep 13, 2006 6:57 pm

Location

Cheshire


Has thanked: 13 times
Been thanked: 25 times

Re: A310 1982 spring tools and techniques

Postby johnb » Wed Jun 15, 2016 1:30 pm

Øyvind wrote:Anyone wants to share their experiences regarding dismantling (for now) front springs and shock absorbers? It is cramped and none of the spring clips I've got hold of suites.


Agreed, there's not a lot of space because the body interferes with access. I used the spring compressors shown in the photo and also used at least one hook, placed at the back of the spring when first attempting removal and adjusting the compressor positions by trial and error.

Once the spring is compressed and freed from the spring pan on the shock absorber and freed from the turret, the bolt at the top of the shock absorber can be removed. The locknut at the bottom of the shock absorber can also be unlocked. The shock absorber can then be unscrewed from the bush attached to the top suspension arm. I can't remember whether I unscrewed it by hand or with a spanner on the locknut. From memory, the spring can then be moved sideways at the bottom to drop out the shock absorber.

Reassembly is the reverse process. The photo shows it going back together just before releasing the spring compressors. I can't remember whether I used hooks during the reassembly, none visible in the photo, but if I had they would have been removed by this stage before the spring was sat on the pan. The shock absorbers that I used came from the previous owner when I bought the car. They are standard units form Mecaparts.
You do not have the required permissions to view the files attached to this post.
1970 A110V85 and 1980 A310V6.
User avatar
User

clee

Rank

Non Member

Posts

10431

Joined

Fri May 28, 2004 11:58 am

Location

Derbyshire


Has thanked: 54 times
Been thanked: 104 times

Re: A310 1982 spring tools and techniques

Postby clee » Wed Jun 15, 2016 5:09 pm

If it's anything like the GTA/610 then better to remove the toparm and shock as one and do it on the bench .
User avatar
User

johnb

Rank

Club Member

Club Member
Posts

857

Joined

Wed Sep 13, 2006 6:57 pm

Location

Cheshire


Has thanked: 13 times
Been thanked: 25 times

Re: A310 1982 spring tools and techniques

Postby johnb » Wed Jun 15, 2016 5:46 pm

clee wrote:If it's anything like the GTA/610 then better to remove the toparm and shock as one and do it on the bench .


It came out quite easily the way I described.
1970 A110V85 and 1980 A310V6.
User avatar
User

clee

Rank

Non Member

Posts

10431

Joined

Fri May 28, 2004 11:58 am

Location

Derbyshire


Has thanked: 54 times
Been thanked: 104 times

Re: A310 1982 spring tools and techniques

Postby clee » Wed Jun 15, 2016 6:07 pm

OK .If it will unscrew and the compressors clear then you're golden ..If it's locked solid with rust then take the assembly off :up
User avatar
User

johnb

Rank

Club Member

Club Member
Posts

857

Joined

Wed Sep 13, 2006 6:57 pm

Location

Cheshire


Has thanked: 13 times
Been thanked: 25 times

Re: A310 1982 spring tools and techniques

Postby johnb » Wed Jun 15, 2016 6:38 pm

clee wrote:OK .If it will unscrew and the compressors clear then you're golden ..If it's locked solid with rust then take the assembly off :up


Both on mine unscrewed easily and the claws of the compressor were well clear of the shock absorbers as can be seen from the photo. If rusted solid then, yes, remove the top suspension arm and remove the shock absorber on the bench. In either case the compressors would have to be clear of the shock absorber.
1970 A110V85 and 1980 A310V6.
User avatar
User

clee

Rank

Non Member

Posts

10431

Joined

Fri May 28, 2004 11:58 am

Location

Derbyshire


Has thanked: 54 times
Been thanked: 104 times

Re: A310 1982 spring tools and techniques

Postby clee » Wed Jun 15, 2016 6:49 pm

I meant clear the bodywork whilst unscrewing and that depends on the compressors .Safer and better on the bench + you can properly inspect the assembly .Guy asked for options and I've given one is all ...skinning that cat :up
User avatar
User

johnb

Rank

Club Member

Club Member
Posts

857

Joined

Wed Sep 13, 2006 6:57 pm

Location

Cheshire


Has thanked: 13 times
Been thanked: 25 times

Re: A310 1982 spring tools and techniques

Postby johnb » Wed Jun 15, 2016 7:22 pm

clee wrote:I meant clear the bodywork whilst unscrewing and that depends on the compressors.

OK, yes agreed.

clee wrote:Guy asked for options and I've given one is all ...skinning that cat :up

Yes, I'm sure he'd welcome opinions from anyone with practical experience. :up
1970 A110V85 and 1980 A310V6.
no avatar
User

Øyvind

Rank

Non Member

Posts

24

Joined

Mon Jun 01, 2015 10:04 am

Location

Norway


Has thanked: 0 time
Been thanked: 0 time

Re: A310 1982 spring tools and techniques

Postby Øyvind » Fri Jun 17, 2016 4:38 pm

I was going to upload an image of my front suspension, but when seeing the picture above, I got second thoughts in case of cardiac events among the members. Since my compressors are more suitable for Scania trucks the option to take the whole thing out sounds tempting. So how do I do that, exactly? I know I'm sounding disturbingly unexperienced, so an explanation adapted to this level is more than welcome, thank you.

Øyvind
User avatar
User

johnb

Rank

Club Member

Club Member
Posts

857

Joined

Wed Sep 13, 2006 6:57 pm

Location

Cheshire


Has thanked: 13 times
Been thanked: 25 times

Re: A310 1982 spring tools and techniques

Postby johnb » Sat Jun 18, 2016 1:05 pm

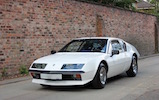
Øyvind wrote:I was going to upload an image of my front suspension, but when seeing the picture above, I got second thoughts in case of cardiac events among the members. Since my compressors are more suitable for Scania trucks the option to take the whole thing out sounds tempting. So how do I do that, exactly? I know I'm sounding disturbingly unexperienced, so an explanation adapted to this level is more than welcome, thank you.

Øyvind


It’s 4 - 5 years since I took the car apart and put it back together again so remembering exactly what was done is a bit sketchy in places. However, as I removed the shock absorbers and springs with the top suspension arms still in place I’m now only guessing at how it could be done with the top suspension arm still attached to the shock absorber.

As I’ve not disassembled the components as described below I must add a disclaimer that these are purely opinions of how it might be done and not necessarily a statement of how it should be done. You’ll obviously appreciate that springs under compression can store a lot of energy and should be treated with respect and caution.

The spring compressors in the photo earlier in the thread were borrowed from my local garage/MOT test station. I must have had a problem with my own spring compressors (photo) to have used the borrowed ones. This may have been because of interference with the body that Lee mentioned. The borrowed compressors did the job without too much difficulty. You may have to try a few different positions of the compressors on the spring before the spring is freed. Once you’ve found the position it’s probably worth taking a photo to help during reassembly.

I had a look at my car this morning, with a front wheel off, to see how the top suspension arm was positioned in the unloaded state of the wheel. It doesn’t contact the chassis but appears to be restrained from this by the shock absorber piston being fully extended, i.e. the piston rod pulling on the top mounting bolt. The spring is also still exerting pressure on the top suspension arm. I therefore think that you still will have to use compressors to relieve the pressure on the top suspension arm and top mounting bolt before unfastening anything.

Before the spring is compressed it might be worth slackening, but not removing, the bolt that attaches the top suspension arm to the chassis, to make sure it’s free. When it’s time to remove this bolt it has to be pulled through an opening into the interior of the car. This can be found underneath the carpets and, on the passenger side, behind the pressed steel plate behind the carpet.

Remove the top, diagonal, bracing rod or, at least unfasten it from the suspension arm, and free the top suspension arm ball joint. Also detach the bottom of the torsion bar drop rod from the torsion bar.
Once the spring is compressed and free from contact with the turret and the spring pan on the shock absorber, the top shock absorber mounting bolt and the bolt attaching the suspension arm to the chassis can be removed. The assembly should then lift free for dismantling on the bench.

I think that if you tackle the job you’ll soon find what works or doesn’t work, what’s loaded and what isn’t. If anyone has removed the spring together with the suspension arm they’ll be in a better position to advise. I could quite easily have missed something, hence the disclaimer.
You do not have the required permissions to view the files attached to this post.
1970 A110V85 and 1980 A310V6.
no avatar
User

Øyvind

Rank

Non Member

Posts

24

Joined

Mon Jun 01, 2015 10:04 am

Location

Norway


Has thanked: 0 time
Been thanked: 0 time

Re: A310 1982 spring tools and techniques

Postby Øyvind » Thu Jun 23, 2016 4:54 pm

Impossible to get spring compressors small enough fitting into the wheel arch. On the A310 the top arm is part of the chassis, so the spring is loose when the damper is disconnected from the bottom arm and this is lowered.

I compressed the spring with a jack under the brake disk and kept it together with galv steel band, not from any book I guess, and the rest went like Lego.
You do not have the required permissions to view the files attached to this post.
User avatar
User

simontaylor

Rank

Club Member

Club Member
Posts

5602

Joined

Thu Apr 15, 2004 12:33 pm

Location

Fleet, Hampshire


Has thanked: 44 times
Been thanked: 56 times

Re: A310 1982 spring tools and techniques

Postby simontaylor » Fri Jun 24, 2016 4:13 pm

"lego", I think you mean "Meccano"
1986 : '86 GTA v6 BW-EFR turbo, with Adaptronic ECU
Firsts at
2007 : Gurston Down & RAOC Champion
2008 : Rushmoor & Eelmoor & ACSMC Hillclimb class Champion
2009 : Longcross & Eelmoor
2010 : Crystal Palace & Eelmoor
2016 : Rushmoor & 5th O/A
User avatar
User

johnb

Rank

Club Member

Club Member
Posts

857

Joined

Wed Sep 13, 2006 6:57 pm

Location

Cheshire


Has thanked: 13 times
Been thanked: 25 times

Re: A310 1982 spring tools and techniques

Postby johnb » Fri Jun 24, 2016 4:32 pm

Øyvind wrote:Impossible to get spring compressors small enough fitting into the wheel arch. On the A310 the top arm is part of the chassis, so the spring is loose when the damper is disconnected from the bottom arm and this is lowered.

I compressed the spring with a jack under the brake disk and kept it together with galv steel band, not from any book I guess, and the rest went like Lego.


That's one way of doing it, for sure.
1970 A110V85 and 1980 A310V6.


  • Advertisement

Who is online

Users browsing this forum: No registered users and 17 guests

Powered by phpBB ® | Renault' and 'Alpine' are trademarks of Renault S.A.S. or its subsidiaries and are used with kind permission of Renault France